
More so than any element of a recording studio, acoustic treatment is the one thing most likely to be underestimated, and overlooked.
Too often, musicians place far too much importance on instruments, and recording equipment…
While failing to address far more important question of how those instruments will actually sound when recorded in the room.
Because the honest truth is, room acoustics impact the quality of your work far more than you likely realize.
And it’s the #1 reason people get frustrated and give up..upon discovering that their $3000 condenser mic sounds no better (and often times worse) than the $100 mic they had before.
So to avoid this fate, the best thing you can do is develop a truly deep understand of this topic, as early-on as possible. And today in this post, that’s exactly what I’ll help you do.
When you make a sound in a room, here’s how it ultimately reaches the microphone:
Since direct sound does not interact with the room, its frequency balance remains pure, and its tone unaltered.
Reflected sound however, is highly affected by various aspects of the room including the size , angles , and reflective/absorbative surfaces within it.
This change could either big or small, good or bad.
But in most rooms, it’s bad. And here’s why:
Have you ever been in a huge room with high ceilings and textured walls, like a cathedral for example?
If so…did you notice how great it sounds in there?
That’s because rooms like these are not only designed to LOOK beautiful…they’re designed to SOUND beautiful as well.
But rooms such as these with great acoustics require a LOT of space and money to build.
But originally, it was the one and only way to get this sort of larger-than-life sound out of a voice or musical instrument.
And any other normal-sized room simply sounds awful in comparison.
Since then however, recording studio technology has found a much easier and cost-effective way to replicate the sound of a large room, without actually recording in one.
Way back in the 1960’s…someone invented the awesome machine known as the Echo Chamber.
This brilliant machine allowed engineers to simulate the reverb of a room OTHER than the one where it was recorded.
And it was the first instance of faking a big room sound from a small studio.
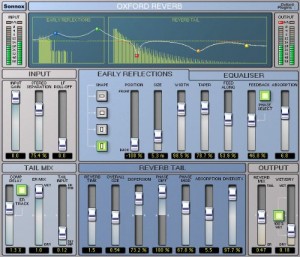
Then over the years, the technology grew more sophisticated, and today…software programs known as digital reverb can simulate the sound of virtually any acoustic environment imaginable.
The only catch is: you can always digitally add FAKE reverb to a sound…but you can’t digitally remove the reverb that’s already there.
So instead, you need to remove the REAL reverb at the time of recording.
Put simply, the purpose of acoustic treatment in a recording studio is to remove any nflattering reverb…
And as much as possible, record only the direct dry sound of the instrument. That’s how it works in theory.
In practice though, engineers and musicians have found that absorption actually works best in combination with another type of acoustic treatment known as diffusion.
When your acoustic treatment plan consists entirely of absorption…
You’ll most likely find that the room sounds uncomfortably “dead”.
So the solution here is to allow a few reflections to remain, but scatter them with diffusors, so ambience sounds neutral and pleasing to the ear.
Normally, untreated reflections cause problems because they get trapped in one spot, amplifying some frequencies, while canceling out others. This is how the natural frequency balance gets destroyed.
Diffusors solve this problem by those scattering reflections so nothing gets trapped, and the natural tone is preserved.
With the right combination of both absorption and diffusion, you can transform the acoustics of virtually any room…into something capable of a world-class recording.
Too often, musicians use the terms soundproofing and acoustic treatment interchangeably…
Mistaking one for the other when really, they’re completely different. So let’s clear things up.
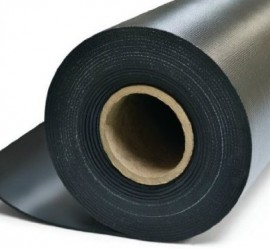
The purpose of soundproofing is to block the sound that travels IN and OUT of the room with:
The main benefit here is: you can record whenever you wish, without worrying about you and your neighbors disturbing each other.
Acoustic treatment on the other hand, ONLY controls reflections WITHIN the room, to make better sounding recordings.
BOTH of these are valuable, but NEITHER does the job of the other.
If you want to learn more about soundproofing specifically, check out this post:
In pro studios, where separate rooms are used for recording (live rooms) and mixing (control rooms)….
Different acoustic treatment strategies exist for each one.
Without going into too much detail just yet, live rooms generally want a uniform spread of sound in all directions…
While control rooms generally arrange their acoustic treatment around the position of the studio monitors.
For more detail on this subject, here’s a separate post for you:
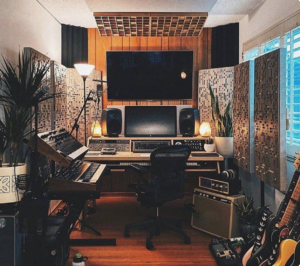
Now…if your home studio, like most, uses a single room for both purposes, your acoustic treatment setup will blend strategies from each type of room into a single hybrid plan.
Which we’ll discuss in a moment. First though…
Now that we’ve covered both absorption and diffusion, let’s look at the 3 standard tools used to accomplish them:
Now let’s learn more about each one…
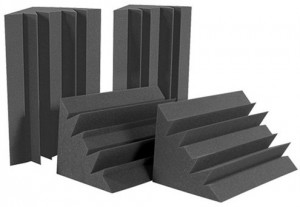
The first and most important element is bass traps .
If you can only afford 1 thing, get these. And here’s why :
Bass traps don’t just absorb low frequencies, they absorb ALL frequencies.
So they maintain the natural frequency balance of the reflected sound.
In small rooms especially, where bass frequencies can be particularly problematic, they’re a must-have.
To learn more about this topic, check out this post :
Classic Example:
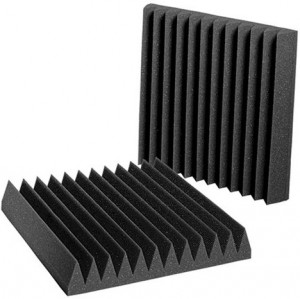
Commonly known as the primary weapons against poor acoustics…
The truth is, acoustic panels are mostly ineffective at absorbing the lowest bass frequencies…and should therefore be used only AFTER bass traps, not before.
On the other hand, since bass traps are located in the corners of the room, the one thing they can’t do is kill standing waves that exist between opposite parallel walls.
So THIS, is the main job of the acoustic panels. (more on this later).
To learn more on this topic, check out this post :
Classic Example:
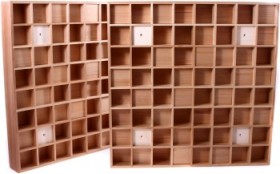
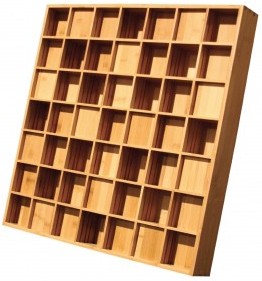
Most engineers agree that diffusers are far less effective in small home studios, compared to the bigger rooms of pro studios.
And as a result, many home studios don’t use them at all.
Which is actually good news if you’re on a budget, because they’re actually quite expensive, far more so than absorption.
On the other hand, other folks disagree on this theory completely, and use tons of them even in smaller rooms.
But if you choose to use them, remember to handle the absorption part FIRST…then if you want to add some later, here are 3 great options I recommend :
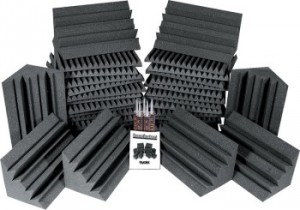
Since buying all this stuff individually can be a huge hassle…
Companies like Auralex and Primacoustic also offer complete room packages to simplify the process and eliminate guesswork.
For home studios, here’s some great packages I recommend :
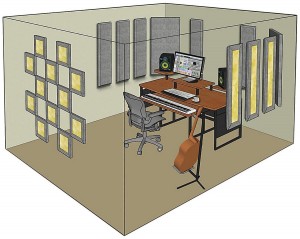
Once you’ve got all your bass traps, panels, and diffusers, it’s time to figure out how to set it all up.
Now don’t underestimate the importance of getting this part right. Because HOW you set things has probably the greatest overall impact on the end result.
So here’s what you do:
Walk around the room and clap your hands as loud as you can from every spot, and listen closely to the reflections that follow.
Most likely, the sound you hear will be somewhere in-between.
If you need some reference points to hear the difference between good and bad acoustics, perform the clap test in a wide variety of different rooms, and take notice of which types tend to sound best.
And even if you’re starting with a great sounding room, you may still want to kill those reflections, to give you more options with adding digital reverb in your mixes later on.
The 3 essential acoustic zones of any room are:
And with a textbook acoustic treatment plan:

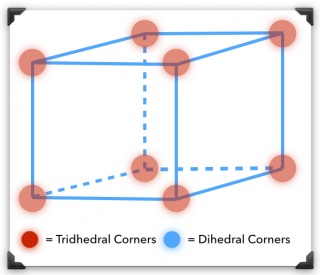
Since bass traps offer the widest range of broadband absorption…
It makes sense to put them in the areas where they can have the greatest impact.
Which is why the first thing you should do when setting up your acoustic treatment is to mount a bass trap at each of the tridhedral corners.

Next, fill in the remaining corners with acoustic panels.
To cover the dihedral corners, simply bend them around the edge as shown in the picture …
And be sure to leave an air gap for maximum low-end absorption.
While I recommend using some of your acoustic panels for this purpose, don’t use them all…
Because you’ll still need many of them for the next task…

Whenever two opposing walls are parallel to each other…
Sound waves have a tendency to reflect back and forth in the same spot…
Causing some frequencies to be amplified, and others to be cancelled-out.
To avoid this problem, mount your acoustic panels flat on the walls, and be sure to spread them evenly throughout the entire room.
To get maximum effectiveness from a limited number of panels, avoid placing panels on BOTH points of opposing walls…and instead, stagger their positions as shown in the above picture.
The commonly accepted theory when it comes to diffusion is:
It’s far more effective in larger rooms compared to smaller rooms.
Add to that, the fact that commercially-made diffusers are quite expensive, and it’s no surprise that most home studios skip them entirely.
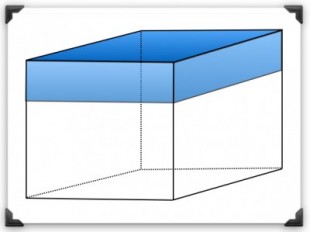
But, if you do use them…place them on the ceiling and upper portions of the wall, above head level, as shown in the diagram.
Everything below this area should be entirely absorption.
Just as you did in the very beginning, it’s time once again to use the clap test to observe the results of all your hard work.
However, rather than waiting until the very end to do this part, it’s actually smarter to do it continuously throughout the mounting process.
That way, you can hear and learn how acoustics evolve with each new piece of the puzzle. By the end, all that nasting ringing you heard in the beginning should be completely gone.
And instead, the sound of your clap should be extremely close to dry, without being so dry that the sound is uncomfortable to your ears.
If it is, try removing pieces a little at a time, possibly adding more diffusion, until you’ve reached the best possible compromise between dry and lively.
Once you’ve found that sweet spot, the job is done. Congratulations.
Now finally to wrap up this post…
If proper acoustic treatment is still too far outside your current budget, here are 5 tricks you can use in the mean-time, to significantly improve the sound of your room without spending much money:

In rooms with poor acoustics, close-miking is one technique you can use to get decent sound from a less-than-ideal situation.
Here’s how it works :
By positioning the mic as close as possible to the instrument (without ruining the tone)…
You increase the portion of direct sound from the instrument, while decreasing the portion of reflected sound .
And as a result, you minimize the impact of any room sound, good or bad.
The biggest compromise with this hack is unnaturally close mic positions often distort the frequency balance with something called “proximity effect”, that results in a boost in the bass end.
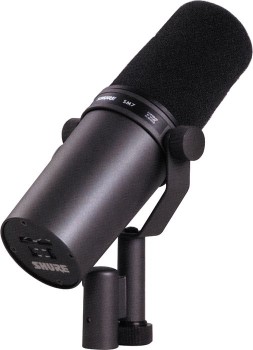
Since dynamic mics are typically less-sensitive than condenser mics…
They also tend to pick up less room ambience, which is good in rooms with poor acoustics.
Which is why, in untreated rooms, you should use dynamic mics whenever possible…especially on vocals, where the difference is often enormous.
You won’t get the same sparkling highs of a condenser mic, but it will still sound much better overall.
On the other hand, using condenser mics in situations such as these will often make the problem even worse, since it captures even the finest nuances of sound.

While acoustic foam manufacturers would prefer you believe that theirs is the only material that works…that simply isn’t true.
Because really, any type of soft porous material such as pillows , blankets , couches , or even clothes , can offer similar absorption.
And since you already have plenty of that stuff lying around your house, it won’t cost a dime to simply store some of it in your studio.
While it might not look as professional as real acoustic treatment, it does help a lot…as long as you remember to stack everything as thick as possible, so all frequencies absorb evenly.
The biggest risk with this method though, is that the acoustic absorption properties of household materials are entirely untested. So you don’t really know if a particular item is going to make things better or worse.
In which case, you just need to use your ears to decide for yourself.

Often better than pillows or blankets, the best natural sound absorber in your house is a mattress.
Which is why the most popular DIY method of recording vocals is to prop an old mattress against your wall so its directly behind the singers back as they perform.
Remember though, that making this technique work requires effective broadband absorption. And to do that:
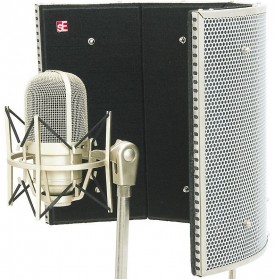
While not quite a free solution, reflection filters are still far cheaper than outfitting your entire room with acoustic treatment.
Rather than absorbing reflections scattered about the room, they use a semi-circle trap to by catch them before they even enter the room.
As you might expect, this still doesn’t work quite as good as doing things the proper way.
But it works decently, with much less setup, more portability, and 1/10th the cost of a typical room package.
Use this tool together with the previous 4 hacks, and your recordings will sound 1000x better than they otherwise would in a bare room.
To see which ones I recommend, check out this post :
Our #1 Favorite Online Superstore: